|
|||||
|
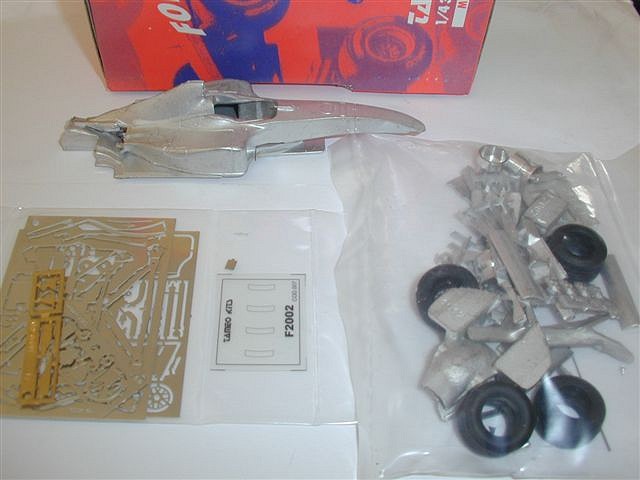
Following one or two criticisms of the Tameo BAR 01 kit, particularly the lack of a decal placement guide, I thought I would write a few thoughts on my latest Tameo purchase. Upon opening the box the appearance is typical Tameo. The white metal body and chassis is encased in a yellow plastic mesh, other metal parts and tyres in a plastic bag, photo-etch frets in a separate bag at the bottom and the decals are stapled to the instruction sheets and curled around the shape of the box.
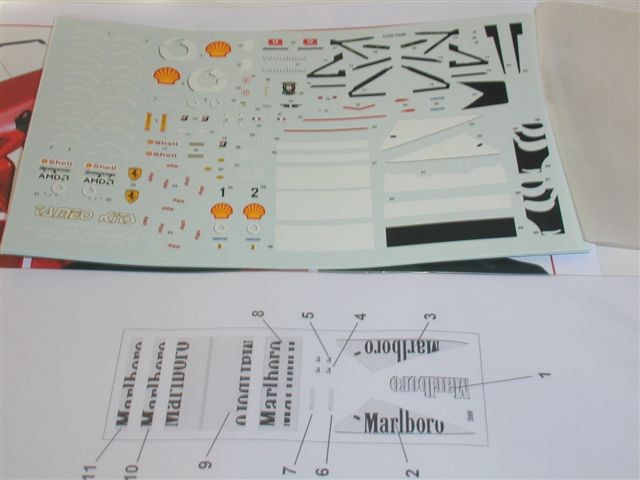
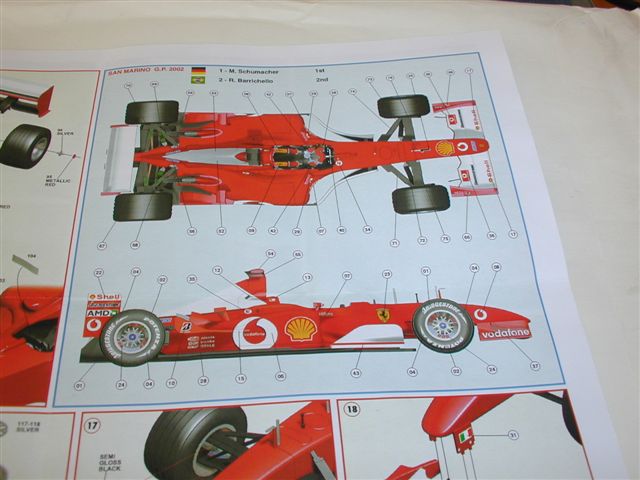
Once I started removing the parts from the box a few changes became evident. The first was a comprehensive decal placement guide! All the decals on the (duplicated) sheets are numbered and their positions shown on a 1/43 scale picture of the car. The Marlboro decals are included too in a sealed bag also containing a placement guide. Thank you Mr Tameo! Whilst on the topic of decals, this kit does not include the usual black coated photo-etch for the suspension. Instead they are the normal "silver" PE metal with carbon fibre decals provided to cover them. The carbon fibre pattern is very fine but should still look very good on the completed model. As for application, I will reserve comment until I have built the kit. The photo-etch frets in this kit have their plastic bag divided into two compartments. The second contains a thin sheet of acetate type material with the outlines of four windshields (one of which I used for the BAR 01), as well as the rear stop light and a tiny turned aluminium antenna. Other antennas are cut to length from a provided piece of thin gauge wire. This is an improvement over the previously used black plastic “wire” which I think looks out of scale.
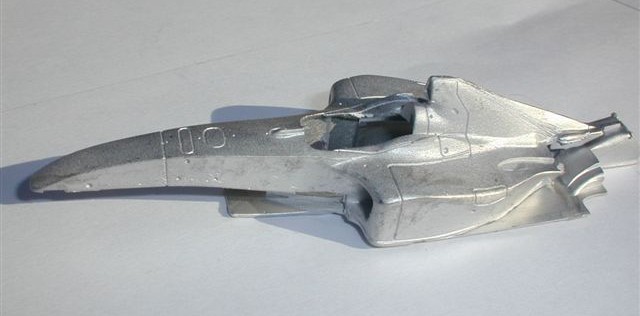
I have had problems in the past with Tameo’s use of two separate PE supports for the front wing. Unless you are very careful they don’t always end up “square” or of equal length. Tameo have solved this problem by introducing a one piece support made by bending a PE part into a square inverted “U” shape. Now, so long as you make sure the mounting part underside the nose is flat, there should be no more worries about “wonky wing” syndrome. Another innovation is the provision of a male/female “die” for shaping the delicate “gills” on the side of the airbox just behind the driver. The gills are the only parts on the small brass PE fret which is placed in the female die, covered with the male part and pressed into shape using a hammer! Attention to detail like this is a hallmark of Tameo kits and is what keeps them at the top of my list for quality 1/43 products. On the downside, the rear of the body in my kit is not moulded particularly cleanly on one side. This will require a bit more than the usual amount of filing and sanding needed for a Tameo kit but I’m sure it will look acceptable in the end.
Overall, this kit shows a number of improvements and innovations over previous Tameo F1 kits I have seen. I’m looking forward to building it (eventually) and I’m sure it will produce a model typical of Tameo’s reputation for accurate and well engineered kits.
|