|
|||||||||
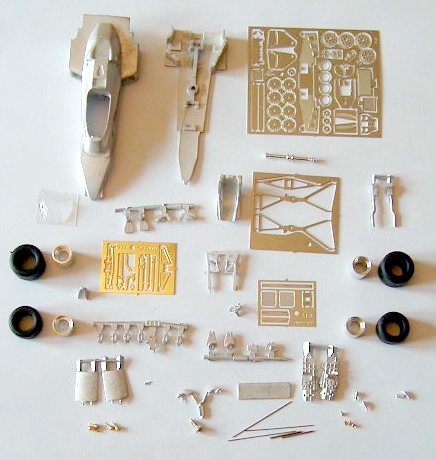
The kit and building The decals are also what we have come to expect from Tameo with two sets of the main decals plus an additional smaller set for the slight changes between the Rosberg and Senna car.
The build sequence is very well laid out in the computer-generated instructions, which also benefit from being in colour. Having prepared all the castings for painting, very little cleaning up is required and all holes are located easily from the instructions that also show the hole size, they were given a coat of either white or grey primer depending on the final colour. The photo etch was prepared next, however I removed the wheel centres and rear suspension mounts as these I felt looked the right colour without painting. Painting of the parts is quite simple from the instructions and proved no problem.
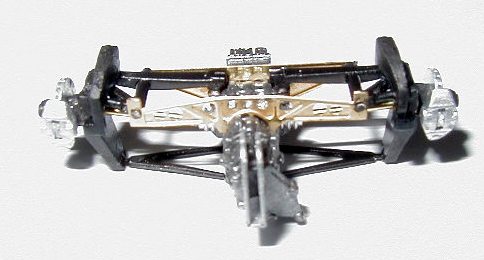
The floor plate is the next area to work on and this is where I experienced my only problem with the kit. The gearbox casting and the floor casting would not mate, the gearbox was too wide for the locating hole in the floor. This was soon remedied with a bit of filing. With the gearbox located the exhausts are fitted followed by the photo etch radiator fronts.
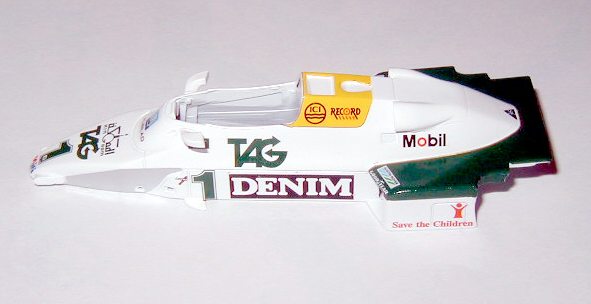
I jumped around the instructions a bit from here on and built up the front suspension and then the rear wing, again another brilliant assembly, particularly the turner lower support. The cockpit and seat were next. I have to admit that I am not keen on the photo etched belts that Tameo supply, I much prefer the self adhesive belts and photo etched furniture that come with the BBR kits. The seat was completed by adding the photo etch chassis section. The front bulkhead was added to the bodywork and the seat assembly inserted. Next was the gear change, formed from 3 parts, and the steering wheel and dash. The front suspension was then added along with other ancillaries such as roll bar, side pod grills, front wing elements and the rear wing assembly. The wheels I felt needed no painting as the turned and photo etch parts had a more realistic finish than painting would have given them. With the Goodyear decals applied and sealed with matt varnish the tyre and wheel assemblies were added to the car using the very small locating pins provided. Please Tameo we get two sets of decals but only 4 wheel pins which when dropped on any carpet are lost forever, a couple of spare would be helpful. The car was complete.
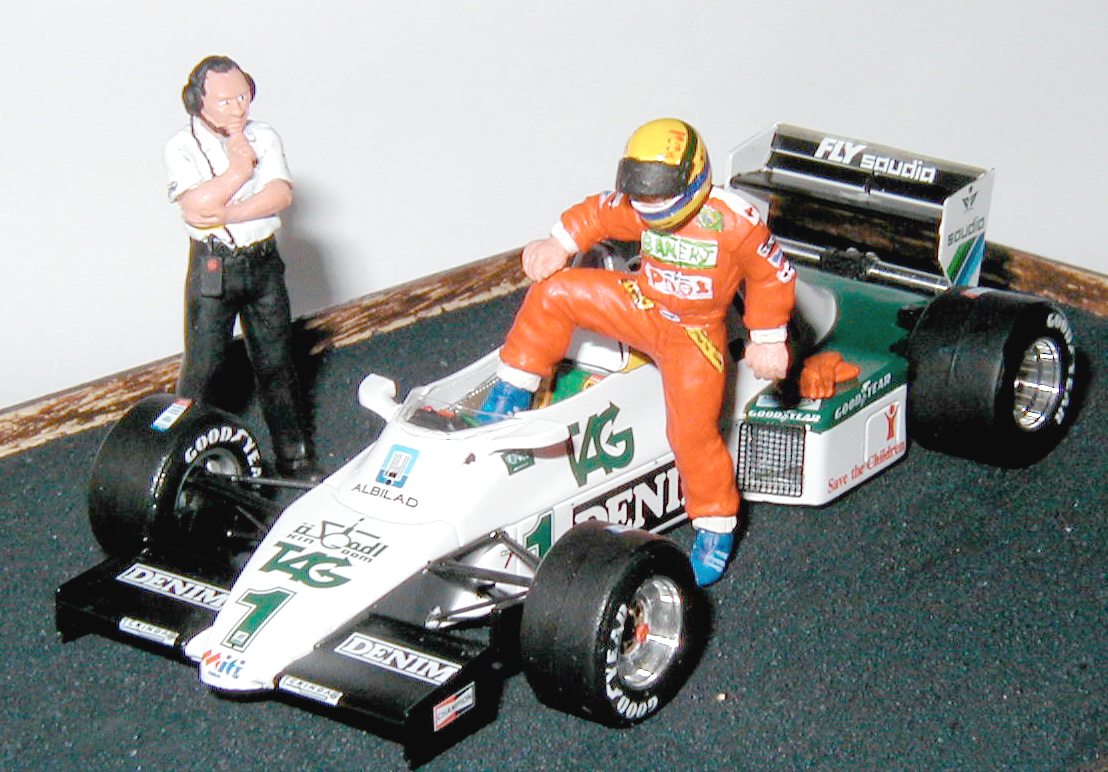
Conclusion I have very few built cars of my own as most that I build seem to be commissions or end up in the local Motor Racing Memorabilia shop so I decided to make a small diorama from the built Williams kit. I wanted to keep it simple so I opted to add just a couple of figures to it. I decided on a Williams engineer and a figure of Senna. I have been using the Denizen range of figures for some time and frankly there are no others to touch them. The range is excellent, covering every decade of Grand Prix racing with many different driver poses and a set of mechanics both in overall or shirts. I had a driver figure in my box posed climbing into the car and from my library of GP books it was painted to depict Senna in his F3 Pool Jeans overalls. The engineer was painted to suit the Williams team of the time and the diorama was assembled on a base that I had simply painted with tarmac textured paint from our railway friends. I am pleased with the overall result of the build, the kit is nothing short of what we expect these days from Tameo.
|