|
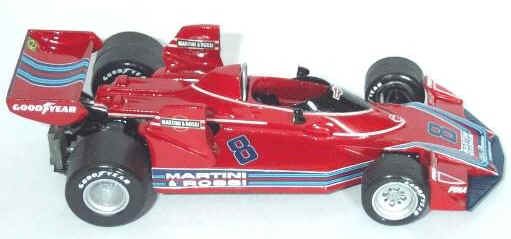
Manufacturer: Scale Racing Cars
Race: US GP (West) Long Beach 1976
Drivers: Carlos Pace (Carlos Reutemann)
Engine: Alfa Romeo V12 (180 degree)
Kit number: 52-99
|
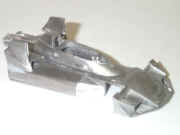
The Martini sponsored Brabham BT45 was designed by Gordon Murray around the Alfa Romeo type 33 endurance racing engine. The Alfa engine was a flat V12 giving the car a low centre of gravity, however the engine was extremely heavy on fuel, which negated any aerodynamic advantage.
The drivers for 1976 (as 1975) were Carlos Pace (Brazil) and Carlos Reutemann (Argentina), who between them managed three fourth places during the season, Reutemann at the Spanish GP and Pace at the French and German GP's. Reutemann became disillusioned with the car towards the end of the season and moved to Ferrari before the Italian GP, which a certain Mr Ecclestone didn't take kindly to !!
The unreliable car finished the season with a very disappointing 10 points (7 Pace, 3 Reutemann).
|
The Kit
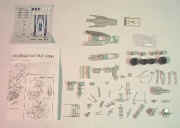
The box contains an A4 instruction sheet with the build details on one side and decal positioning drawings on the reverse. All the parts supplied apart from suspension springs, seat belts and screen are in white metal. There is also a sheet of high quality decals (Interdecal). All the white metal parts were nicely made, fitted together well and the only parts requiring significant filling were the large air intakes.
|
|
The only photo-etched piece in the kit is the beautifully made seat belt assembly. The exploded drawing assembly instructions are fine for building the car, but the decal positioning instructions are inadequate for some of the decals and a couple appear to be numbered incorrectly. A couple of colour photographs supplied with the kit would make decaling the car a lot easier.
The Build
|
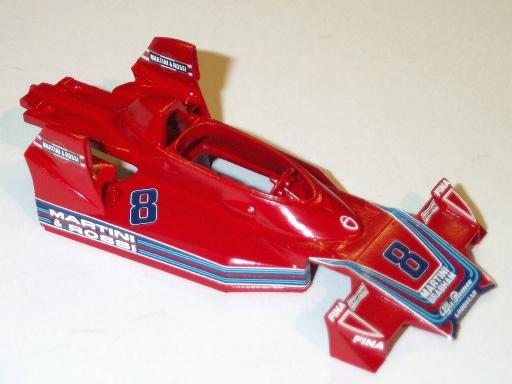
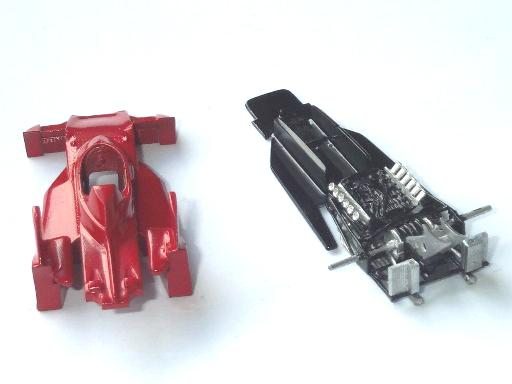
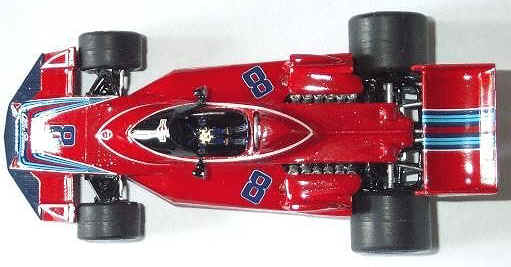
As usual I started by preparing the body for spraying. The main body parts include upper and lower sections, front wing ends and large rear side mounted air intakes. I decided to glue the upper and lower sections together and spray them as one piece, although the instructions indicate that the upper section can be lift-off. (unfortunately I found out later that fitting the seat between the two glued sections requires a fair amount of alteration).
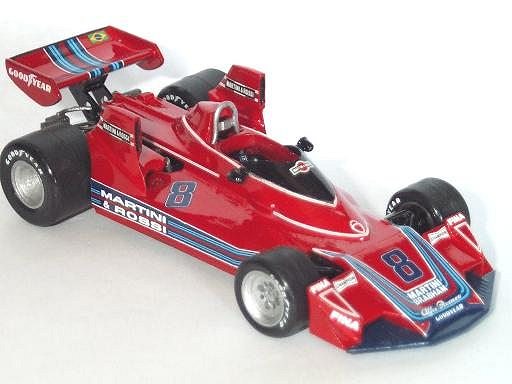
The fully prepared body assembly was sprayed red, for this I used Humbrol acrylic 'bright red'. There are no suggested colour shades in the instructions, but this colour seemed close to photo's of the real car. I now left the body to dry thoroughly for a few days before decalling
|
|
|

|
|
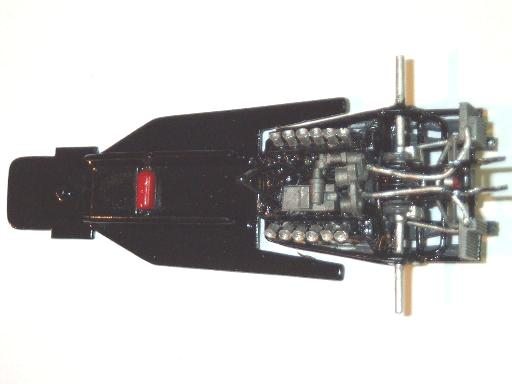
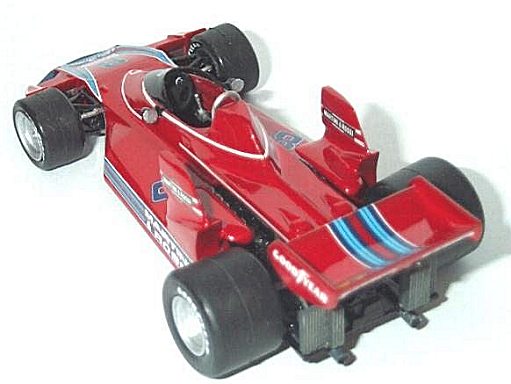
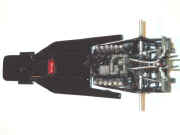
I now followed the instructions and built the front end. This included, pedals, suspension arms, springs and brake / wheel hub assemblies. A single spring is supplied which needs cutting into four. When this assembly was complete I glued it to the floor section. The rear section was built up next. The instructions are very good in this area and all these parts fitted together perfectly after removing flash from each part. As you can see from my photo's the completed engine, exhaust, radiator and suspension assembly are superbly cast and realistic looking. The whole chassis and engine section was now painted and left to dry.
|
|
When completely dry the decals were added to the body, and for this I finally found some good photo's on the internet, as the diagram in the instructions is not good enough to position some of the decals correctly. At this point there is a choice of whether to decal as at Long Beach or at other circuits. I chose the Long Beach version as the car numbers were blue for this event and seem to look better. Decal no's 2 and 3 in the instructions seem to be the wrong way around, as no.3 is too big for the top of the front wing, I switched these and they fitted fine. All the other decals fitted perfectly and very well made. The body was now clear coated to seal the decals and left to dry ready for the final assembly.
When completely dry the steering wheel and rollover hoop were added. The rollover hoop is indicated to be black on the instructions but all the photographs I've looked at show it as silver. The seat and seat belts were now added to the floor, but as I indicated above, I had to narrow the seat shoulders slightly to fit them through the cockpit opening. This was my error and would have been fine if I'd followed the instructions properly. At this point I fitted the painted lower front wing floor. This I painted the same colour as the darker blue on the decal pin striping. The body was now fitted to the floor and the painted and decaled rear wing fitted to the wing mountings. The vac-form screen was now carefully cut and painted matt black on the inside. This was fitted along with the mirrors. Finally the wheels and tyres were added and decaled.
Conclusion
Never having built an SRC model before I was interested to see how a kit lacking in super detailed photo-etching would turn out. I have to say the final model is extremely impressive. It doesn't have any of the tiny intricate parts that you find with Tameo or BBR but still looks every bit as good. The instructions could certainly be improved by adding some colour photographs and a bit more help with paint shades would make things easier, but at the same time searching for useful photographs is all part of the fun. I'm extremely happy with the final result and would certainly recommend anybody who like myself normally builds 'safe' Tameo kits, to give this one a go, you won't be disappointed.
|