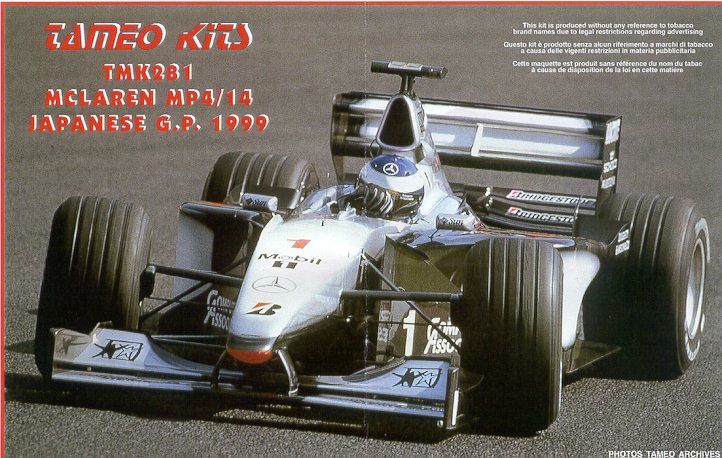
Having this idea in mind, I will analyze the Tameo TMK 281 kit, which represents the McLaren Mercedes MP 4/14, Mika Hakkinen won with, the 1999 version Japan Grand Prix.
This is the first 1/43 scale kit that comes to my hands, therefore many impressions and opinions will be the beginner has, but, if you are in my same condition you'll have a vision of what will find, if deciding to get this kit.
The differences between this scale and their big brothers (1/24, 1/20, 1/12) can be appreciated from the beginning, when you buy this kind of kits. People devoted to the 1/43 scale are very special, the retailers have the knowledge and devotion of real modelers, when selling or giving advices.
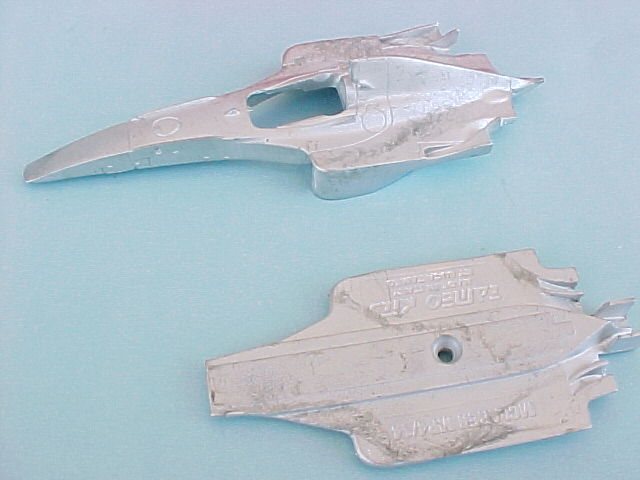
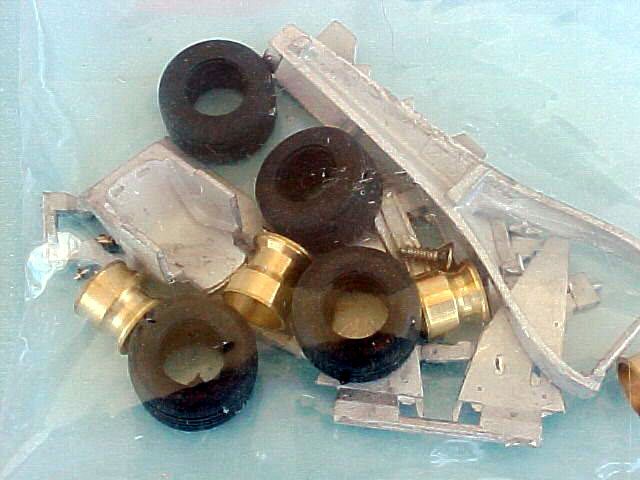
The body, which is divided in two big white metal parts, is provided in a flexible plastic tubing " mesh ", to complete the body others small parts provided in a closed bag will be added.
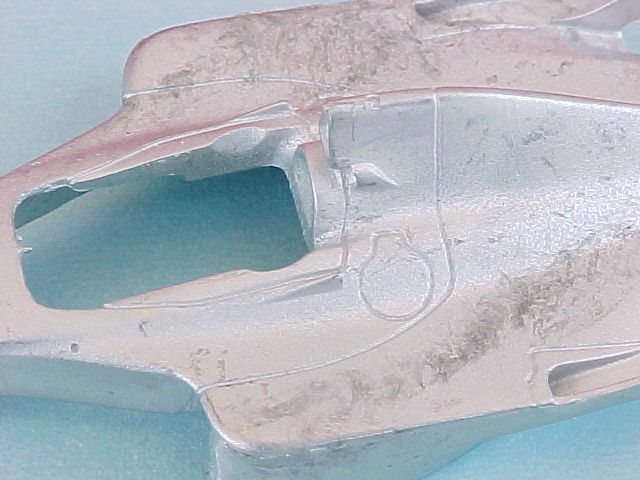
The upper part quality, which represents almost the whole body, is outstanding. All details are engraved with lines of less than 0,1 mm, and the texture, when we touch it, is very soft. There are only two mold flashes in the air manifolds, but very easy to be removed with a small file. The lower body part is of same quality but as always the manufacturer's name is on it, a habit that is necessary to banish, it's only more work for the modeler. Both parts have to be fixed with a conical cap screw which can be covered easily with putty. The white metal parts glue together very well with CA, and can be used as putty with success for very small unions gaps.
Thinking about painting, I would use automotive primer, but I'd apply it with airbrush, also flat Humbrol paint mixed with bright varnish (ratio 4:1) is suitable as base paint. The painting job should have to be done with airbrush, because of the small size of the pieces, in very thin layers with appropriate diluters or retarders to avoid orange peel. You could use paint for real cars or Tamiya's enamel, using different techniques, achieving the same results. The motor induction box intake is closed, but if you have experience with Dremel use, it could be hollowed with a small rose-head tool cutter (1mm or smaller).
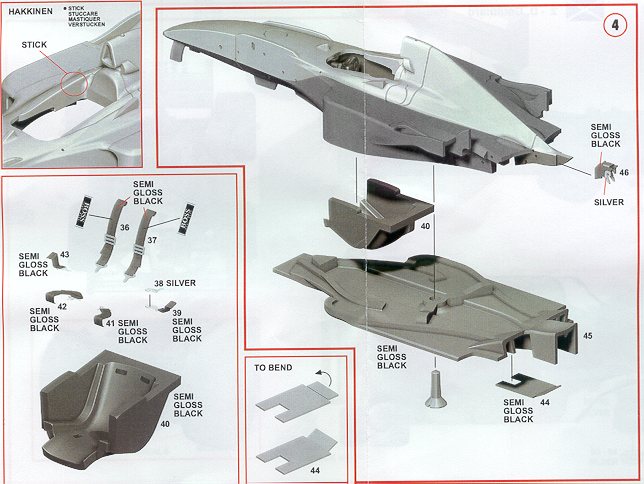
The instruction manual It's very nice and really could be "for collecting". Composed of two A4 pages, one of them is a drop-down one, where you can find all building steps, plus 13 excellent color pictures, this colorful references are enough to go ahead with this project in this scale, very good indeed!, Tameo.
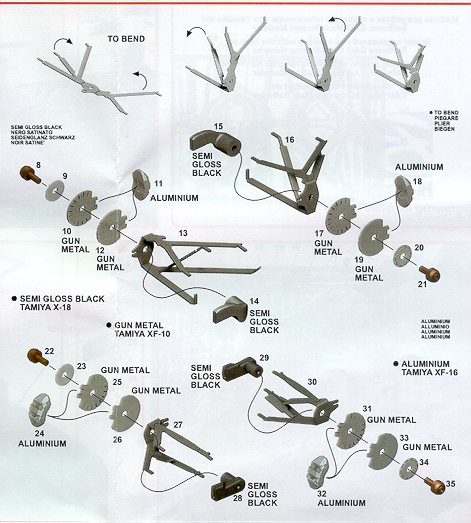
I advise not to open the bags until the moment the pieces are needed, and to make it very carefully inside a clean box, because there are very small parts, unfortunately Tameo doesn't provide a parts listing for a quickly verification. All the pieces of the whole suspension, are provided by Tameo painted in semi gloss black, and they won't need anything more to be used.
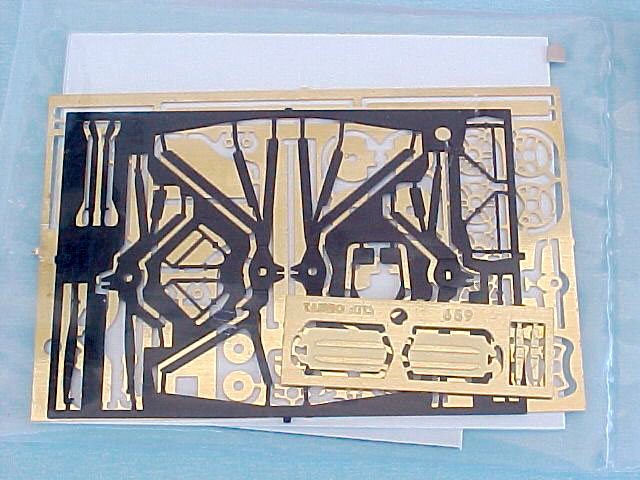
Bending the PE pieces, is an important topic to have in mind in this kit, since it has many and very small ones which will have to be folded . There are special tools on sale to bend parts to 90°, without breaking or deforming the pieces, but I believe that they would not be useful because of the small parts this kit has. My advice is to use a good depilation tweezers, with flat and straight tip. The important thing is not to bend them more than once, if it is a very complicated piece I photocopy and enlarge onto paper then cut out the parts in paper and try the sequence of folds with the paper templates (Note from PCR) The photoetch engraving is usually enough to bend the parts accurately. If unfortunately some piece breaks, you can solve this problem with a small tin or silver welding, or gluing with CA.
The wheels and brakes, which have detached calipers, are amazing. The wheels are brass turned and have a support border inside to place the PE piece, which represents the central area. The assembly should be painted in silver, but I think that for not much money it can be silver-plated, and then polished. Ask a jeweler who can surely make this work.
The wheels, of course are held in their places, with brass turned nuts and holders, really very nice, but, if you want to paint the holders with aluminum paint (as Tameo's booklet shows) it will be necessary to use a magnifier.
The building, I think is not a difficult matter, it only requires care and patience, all the details have been taken into account, from the complete steering wheel to the seat belt.
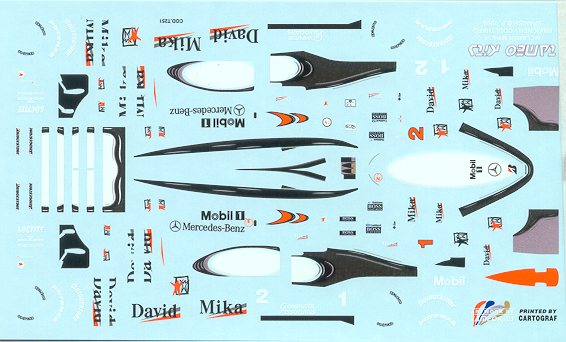
The decals Tameo is very popular for providing two decal sheets with each kit, one of them as back up. In this model, some of these decals are complex to be placed, having a spare one allows us to have a smoothly decaling. Tameo also provides a surprise inside the box. In a sealed black plastic bag are all the tobacco decals. All 1/43rd scale kits sold in Europe have full cigarette decals.
|